映射UV节点
使用 UV 坐标映射纹理,将纹理应用于合成中的物体。
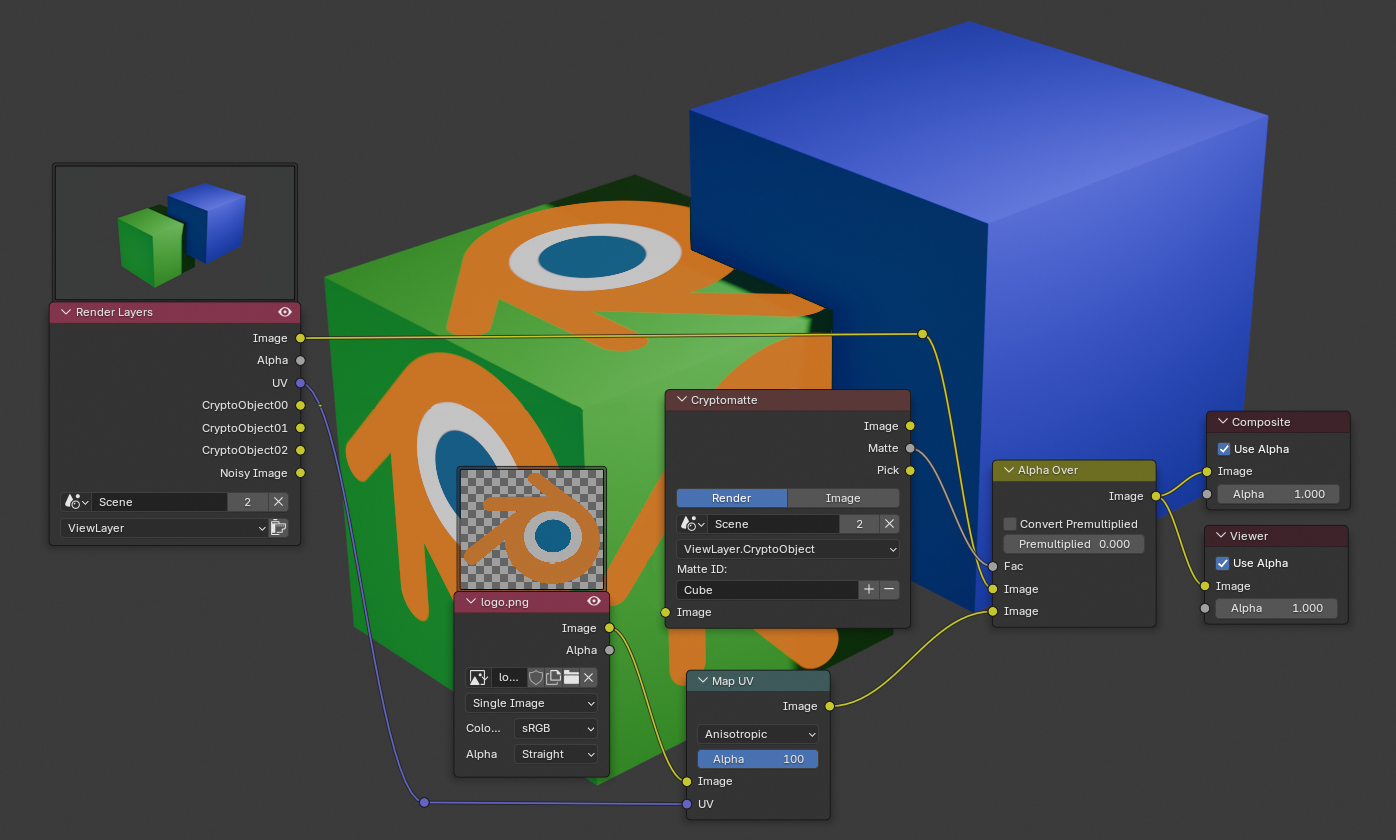
May be used in combination with the Cryptomatte Node to only apply the texture to specific objects.
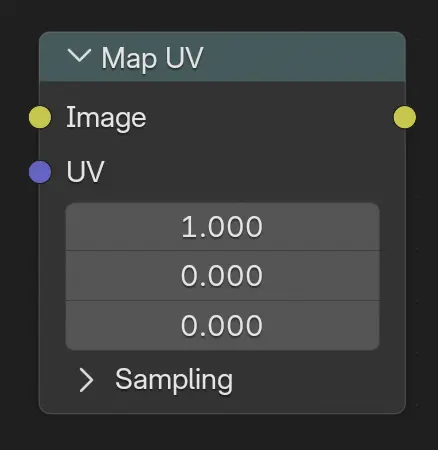
输入
- 图像
The texture to distort.
- UV
The UV coordinates at which to sample the texture. The UV coordinates can either come directly from the UV render pass (Cycles only, see Cycles render passes), or from the image coordinates in which case the Z component must be manually set to 1 (see example below).
Hint
It's possible to store the UV information in a multi-layer OpenEXR file.
采样
- 插值
Determines how pixel values are interpolated when scaling or transforming images.
- 最近:
Uses the value of the closest pixel with no smoothing. This is the fastest method and is well-suited for pixel art or low-resolution images where sharp, blocky edges are desirable. In animations, motion appears in single-pixel steps, which can cause visible jittering.
- 双线性:
Averages the values of surrounding pixels to create a smoother result than Nearest. Provides a good balance between performance and visual quality.
- 双立方:
Computes a weighted average of a larger neighborhood of pixels for even smoother results. Ideal for photographic images or gradients where preserving fine detail is important.
- 各向异性:
Adjusts interpolation based on the direction and scale of the transformation. Helps reduce blurring or aliasing when scaling at steep angles or uneven resolutions, especially useful in textures viewed at oblique angles or in detailed 3D projections.
- 扩展 X/Y
将扩展模式应用于 X 轴。
- 剪辑:
图像之外的区域用透明填充。
- 扩选:
图像之外的区域由图像中最接近边界的像素填充。
- 重复:
图像之外的区域由图像重复填充。
Note
对于 各向异性 插值 模式,此选项不可用。
输出
- 图像
The distorted texture, which can then be overlaid on the render using e.g. the Alpha上叠节点.
示例
In the first example, we overlay a grid pattern on top of two Suzanne heads after they have been rendered. To achieve this, we enable the UV pass in the Property Editor's panel, use it to distort the grid image, and combine the result with the rendered image using the Alpha Over Node.
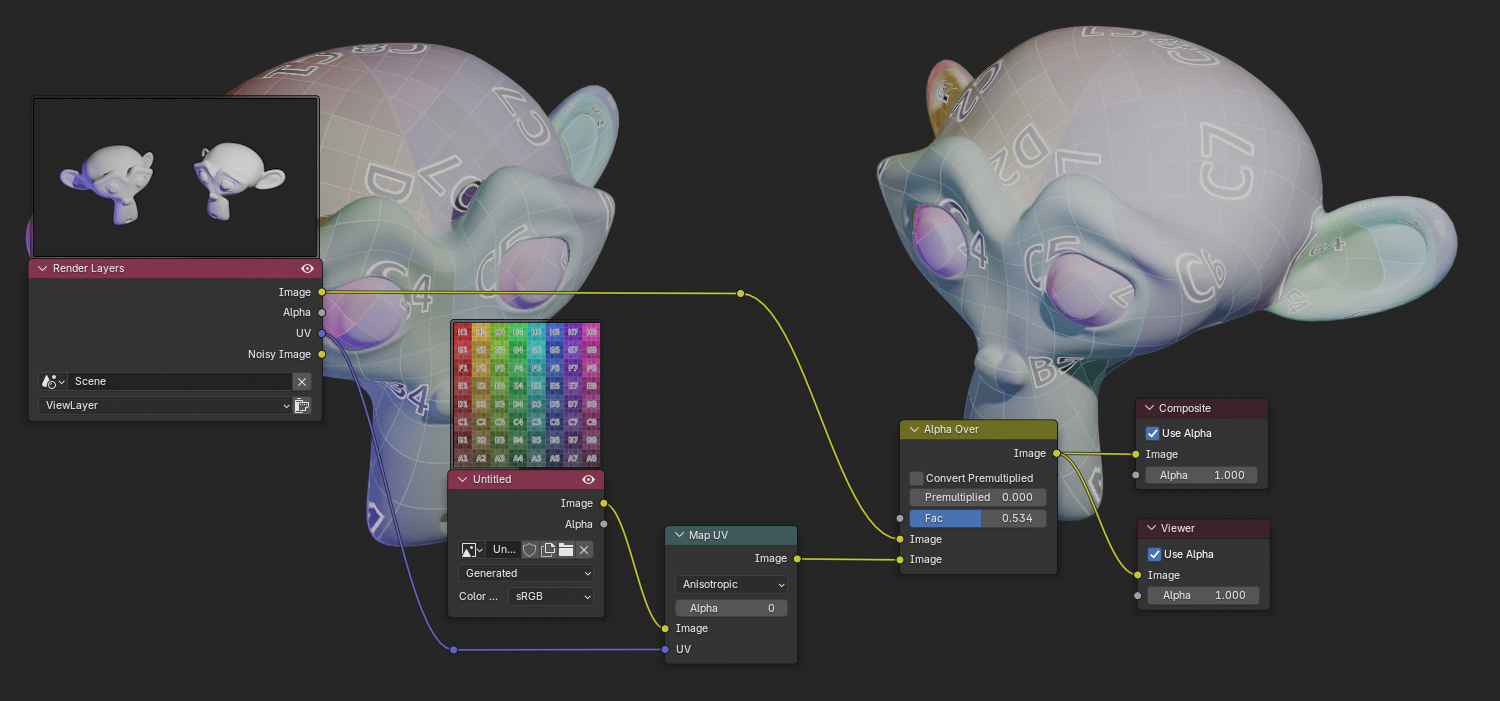
叠加一个栅格纹理。
In the next example, we do the same thing with the Blender logo, using a cryptomatte to ensure it only gets applied to one of the cubes.
It's here that the limitations of the Map UV node become apparent: the overlaid image is really just "plastered on" and is not affected by the lighting and shadows in the scene. At most, you can cheat a little by making the image translucent like in the previous example.
So, while this node can be handy for certain post-production effects or fixes, it's generally not a replacement for including the image during rendering.
叠加一个 logo.
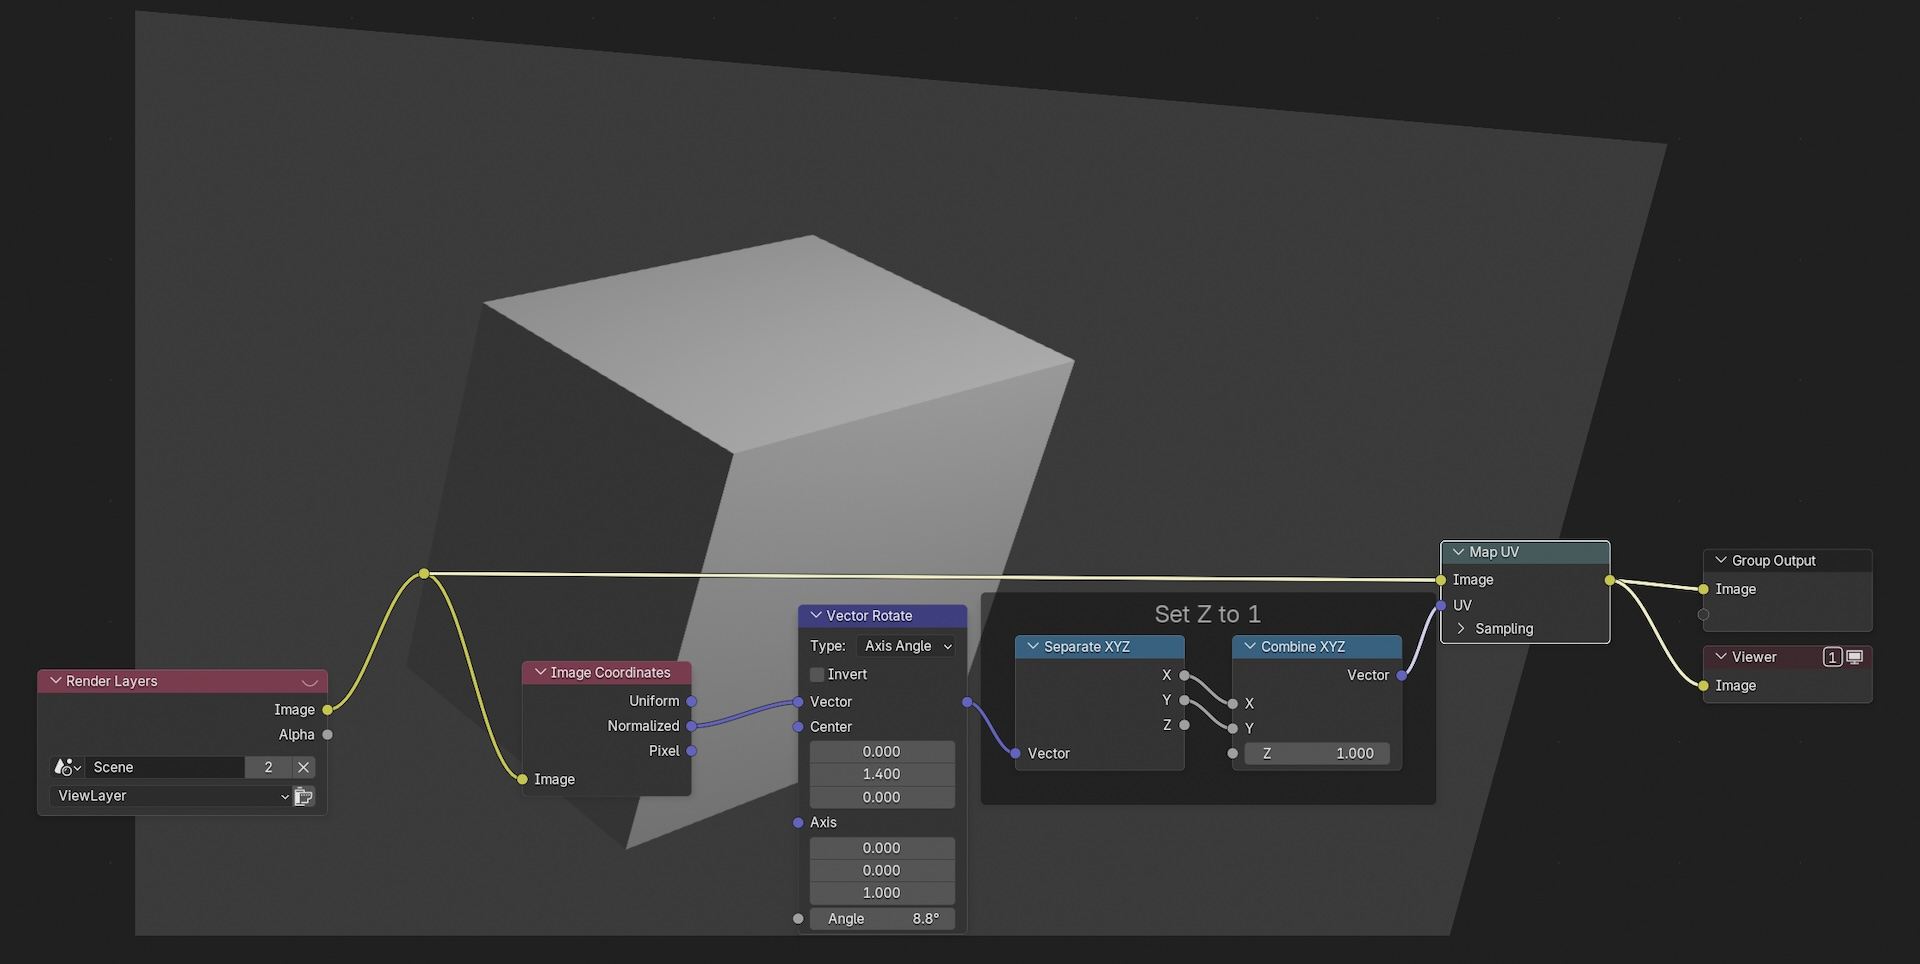
The third example shows how an input image can be distorted using the Map UV node, where the image UV coordinates can be extracted from the Image Coordinates node.
程序化畸变。